CREATE A MOODBOARD
One of the most important steps t achieve good results using Neural Fashion is creating a moodboard for our campaings. The moodboard will include all the information the platform need to understand what kind of results we want for that specific campaing, so we will have to specify the item, the inspiration (if needed) and introduce the concept with text.
Let’s see how we can create a moodboard to start creating!
*For this tutorial you must have already created an item to use.

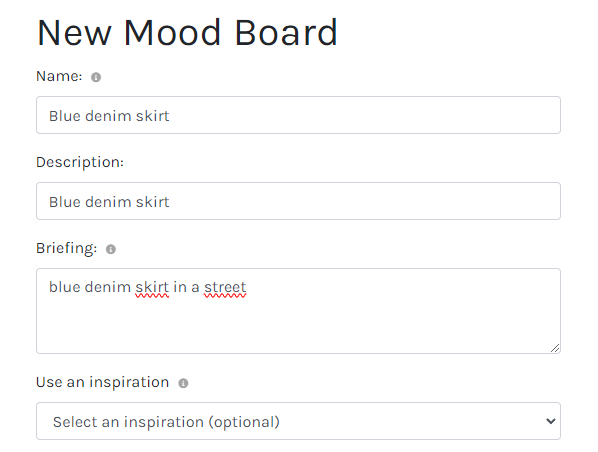
Introduce moodboard information in the new window:
- Name: Write an identifying name. You can use the same name as the item you will introduce (Example: blue denim skirt).
- Description: You can use the same as “the name”.
- Briefing: Add a description for the shooting you want to create. The more detailed, the better our creatives will understand the concept.
- Inspiration: You can add an inspiration to create more accurated results. It is an optional decision.

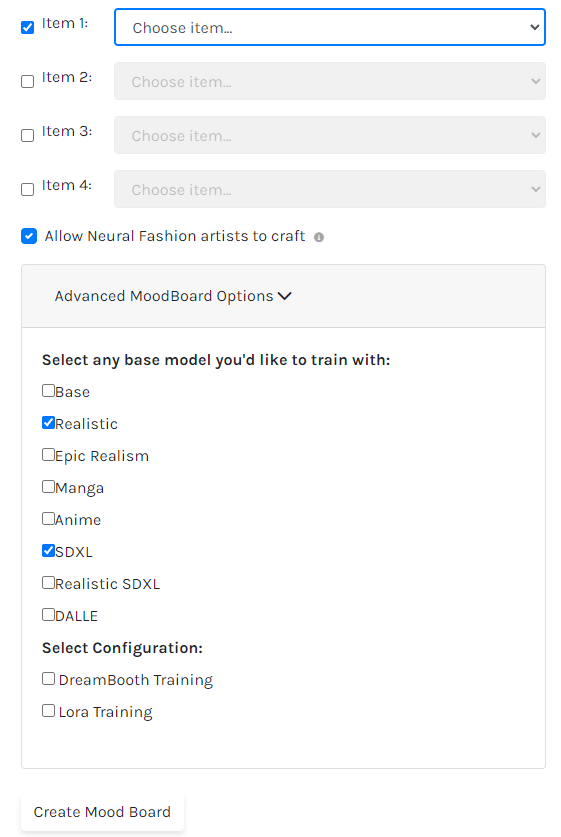
- Select the item you want to use (you can select up to 4 items, they all will appear in every pictures, like a complete outfit). You can make different variations:
- Item
- Item + model
- Item + item
- Mark “Allow Neural Fashion arts to craft”. By doing this you accept that our creatives can help creating images.
- Advenced MoodBoard Options: we reccomend you to always select Realistic (for more realistic results) and SDXL (for more creative results)
- Create Moodboard

After creating the moodboard, you will not be allowed to start creating images, because the system has to train the information you have upload. This process usually lasts around 24 hours, so if you create a moodboard, you will be able to start creating the following day.
To know when the moodboard is ready, you have to take a look to the icon above the name. If there is a clock, it means the moodboard is being trained and if it is a green check mark, it is your moment to create!


